To install electric landing gear on a semi-trailer, first mount the motor, ensure proper alignment, then wire the system, and finally, conduct multiple operational tests to confirm functionality.

Preparing for Electric Landing Gear Installation
To begin with, getting started with the installation of electric landing gear on your semi-trailer, ensure that all things are ready to be rolled out. The first thing you need is a set of tools. The second is the electric landing gear kit containing a motor assembly, control box, and mounting hardware. The third set comprises standard tools such as wrenches, screwdrivers, and a drill.


Picking the Right Model
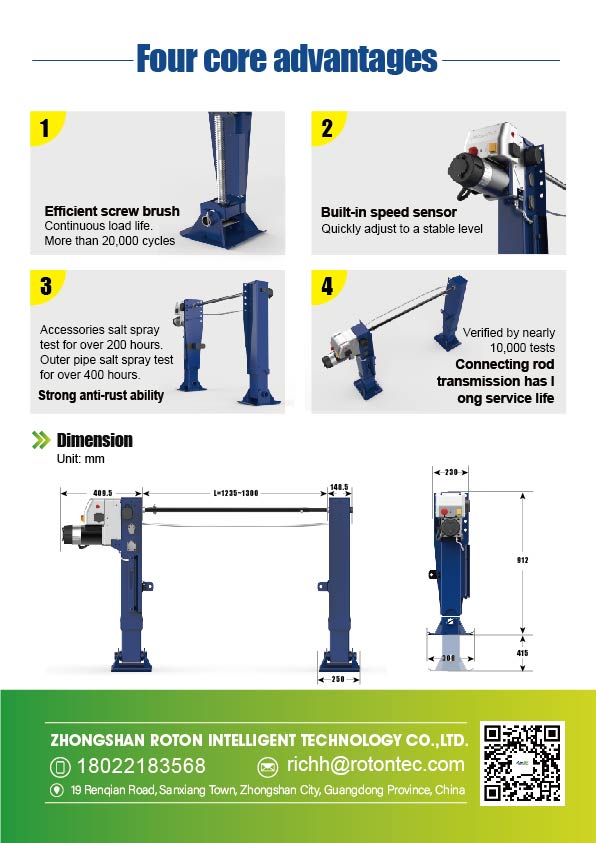
Identify the optimal electric landing gear model according to your trailer’s parameters and lot of work. The lift capacity should exceed your trailer’s max loaded weight; the capacity you can find varies from around 20,000 to 30,000 lbs. Check if the new gear fits the working footprint of your chassis to avoid the fitting cost.
Prefinal Inspections
Another vital step before starting the procedure is to examine the vehicle to check whether the chassis is not worn off and the space for the landing gear is not damaged or rusted. Ensure the fitting place to secure ideal conditions for your new electric landing gear. Clean the area and perform the appropriate repairs to reinforce the system’s installation.
Routing the Wires
Coming back to the tools and materials, ensure your wiring can be linked to the trailer’s power system or provide a battery-packing for the equipment. You need to be sure that your wiring is capable of sustaining the potential loading and put it in a conduit to prevent wearing out. Shield your wiring with something durable, like sheathing, to ensure a long lifespan and protect your connections, especially on a semi-trailer, from wearing out and exposure to the environment.
Attaching the Gear
After finishing the abovementioned steps, attach your electric landing gear to your semi-trailer. Usually, you can directly bolt the main assembly to narrow points of your platform; therefore, your gear adhering must be tight. Ensure that the ground is even to preclude potential complications during operation. After completing all the connections, appliance the landing gear to your new electric system according to the manufacturer’s instructions.
Post-Installation Tests
As everything is done, test whether your installation is successful. It includes assessing the gear for functionality and directly control. Verify that all the mechanisms work properly and the system is not stuck and applies the right amounts of effort to lift and lower your landing gear. If everything is working properly, enjoy the results of the automated landing gear.
Step-by-Step Installation Process
Setting up your electric landing gear is a task that requires the implementation of a series of actions. The steps to be taken are explained in detail below, and you can use the presented tips to ensure that your equipment operates correctly. Start the installation process with confidence, taking one step at a time.
First, unpack the electric landing gear kit and sort all components. Confirm that there are no missing parts by comparing each piece with the list of items supplied by the manufacturer. If the kit has a layout drawing, use this material to understand where each part is used.
Next, place the gear of the main landing on the trailer frame at the points determined by the design. It is important to mount the equipment properly to avoid alignment problems, using the torque values stated in the installation guide when tightening the bolts. This step prevents overtightening and damage to the frame due to the large loads applied.
Bring the electrical cables from the control box to the motor, ensuring that the wires are not located near moving parts and potential pinch points. Use clamps and straps to secure the cables every 6 inches, preventing sagging and unwanted shearing.
Connect the cables to the desired power source and follow the provided wiring diagram in the kit to avoid dangerous short circuits or wiring failure.
Fix the control box at a point accessible to the driver, taking care to protect the unit from the harmful effects of the environment. Use plastic plugs, screws, and bolts to mount the box in a solid part of the trailer. Check the correctness of the completed connections in advance.
Test the liquidation system several times by actuating it to start and stop the lowering and lifting process. Regular problems include the unpleasant noise or binding, requiring adjustments to be made to the joints and reducer. Use the steps described earlier to complete the installation process and upgrade your semi-trailer landing gear. You can be sure that every solution listed in this instruction is verified and should be followed step by step.
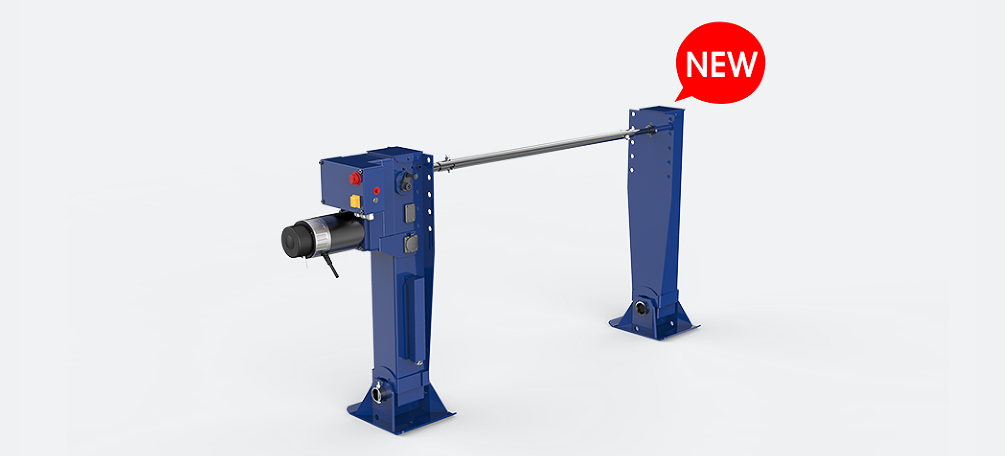
Mounting and Wiring the Electric Motor
The most critical element of your electric landing gear is the electric motor. To guarantee that the motor not only fits tightly but also works flawlessly, this segment will take you through each step, limiting errors.
How to Mount the Motor to the Frame
The electric motor should be selected to suit the trailer frame’s mounting brackets. The motor should first be properly positioned to fit the travel gear roller drive. We can begin by alining the motor with the brackets and applying the heavy-duty bolts. The torque on the bolt by manufacturers ranges from 50 pounds to 70ft. However, it is essential to confirm with your kit to ensure that the motor is correctly mounted.
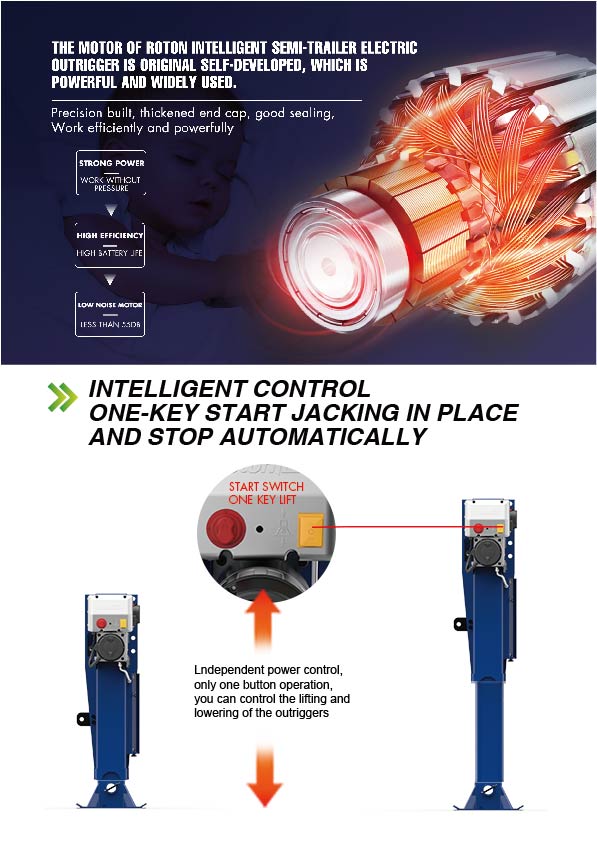
The Connection of Motor Cables
It is then essential to connect the motor after the motor is mounted correctly. First, route the motor cables through to the controlling box while ensuring they will not wear under by-passing the sections of the trailer that may cause damage. It is because of this that under the trailer’s lower part, connect the cables and ties, leaving them loose from the trailers. Connecting and disconnecting the presence of the packed cabling areas can result in damaged trailers.
Electrical Checking
Attach the wires to the motor and controlling box accordingly with a wiring diagram. Before fitting, it is essential to ensure that they are tightly fit and that the wiring is right to avoid short circuits. Second, check the operational of the wiring by seeing whether circuits are open, whether the voltage is present in the wires, by the use of a multimeter Move with your control system and put it in place to mount the motor. You will in time have your trailer lift and lower uniformly. This action also helps regulate your trailers’ life because that machinery can work without malfunction and other circuit errors.

Finalizing Installation with Testing and Calibration
When you have mounted and wired your electric landing gear, the next critical steps are implementation, testing, and calibration. This aspect is vital as it must prove that the system operates adequately in real conditions and tailored in accordance with the need of your semi-trailer.

Functional Testing
To start the testing phase, it is necessary to switch the system on. Ask the landing gear to cycle up and down to see if the system works. Pay attention whether the movements are smooth and regular. Moreover, strictly listen if there is something “off” as any unusual sounds might indicate that there is a problem with the motor or gear. This test must be conducted several times to make sure that this is the usual performance of your landing gear.
Load Test
If you want to ensure that your landing gear is reliable, you need to perform a load test. You may use weights or simply stand a loaded trailer on the landing gear. The purpose is to confirm that the gear can lift and lower its maximum load if necessary. Following the test, there should not be any signs of strain on the gear, for instance, working the motor to its full capacity or difficulty to go up. The whole weight of the trailer must be lifted equally effectively as it would be 1 inch above the ground.
Calibration of Controls
If your electric landing gear is equipped with a programmable control system, it is necessary to calibrate. The purpose is to adjust the control to a particular response time and sensitivity that would better suit the needs of the trailer. This unit may also require restricted motions, such as setting limits on how high or low landing gear can lower. Confirm that the system operates at the right speed.
Safety and Emergency Tests
Remember to check the activation of the hold to move feature and the overall operability of your sensors. It must stop if anything moves under the weight. Regular testings must be conducted to a high degree of safety.
